Categories
Hand-crochet techniques create breathable and fashionable summer bags
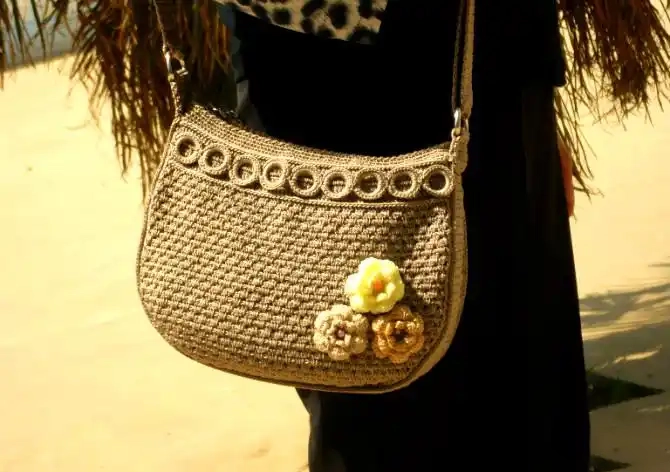
How can a light summer outfit be held back by trivial items? The breathable hand-crocheted bag unlocks a refreshing look. The cross-shaped style teaches you to use short needles to hook out the trapezoidal bag body and the eight-ring ring decoration. Every stitch and thread is a romantic collision of fashion and handcrafting. With it on your back, even the wind carries the warmth of your fingertips.
Jun 16th,2025
218 Views
Overview of Summer Bags
As summer approaches, light skirts have become a fashion standard on every street corner. However, how should daily essential small items such as mobile phones, keys and cosmetic cases be placed? Don't worry. Next, we will recommend several summer bags with excellent breathability to you. These hand-crocheted masterpieces not only keep you cool in the scorching summer but also allow you to enjoy the fashion while experiencing the joy of handcrafting. Come and take a look at these charming crossbody backpacks!
Fashionable choices for bags
Summer lightweight bags are essential items for street fashion. Hand-crocheted bags combine practicality and a sense of fashion. Come and take a look at these charming crossbody backpacks!
1. Crochet steps for bags
This bag is carefully composed of multiple parts, including the front and back pieces, the sides and the bottom, the bag opening and the bag strap. The crocheting of the front and back pieces requires certain skills, including steps such as crocheting a small braid at the beginning, adding and reducing stitches, and ultimately forming an isosceles trapezoid shape. The side and bottom hooking method requires starting with a small braid and hooking short needles in each hole. Note that each time at the end, hook a small braid and then turn it back to hook short needles. Gradually increase the number of needles to 17 or 19 and stop adding more needles. Then, hook short needles straight to 80 rows and gradually reduce the number of needles. After completing the crochet of the front and back pieces and the bottom, a row of short stitches needs to be crocheted on the outside and connected with the short stitches to form the initial shape of the bag. Next comes the crochet of the bag opening. Five rows of short stitches need to be crochet, and the edge should be locked with a crochet hook to perfectly seal the bag opening.
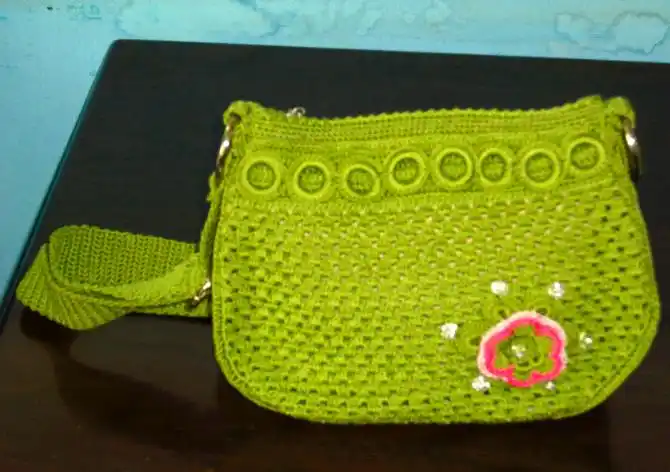
Next come the steps of crochet decorative rings and petals. Prepare 16 or 18 plastic rings. The price is very reasonable. Hook a short needle onto a plastic ring and pause when it reaches half a circle. Then, hook another plastic ring along with it for half a circle. Repeat this process until all eight or nine rings are half hooked. Then turn it back and hook the other half. In this way, an 8-link or 9-link decorative effect can be formed.
Then comes the hooking method for decorative flowers. First, wrap the thread around your finger twice, then hook two small braids inside the loops. Next, hook 11 medium-long stitches, making a total of 12 stitches. Then connect them with a short needle and hook three small braids. Hook a short needle every other time and hook three more small braids. Repeat this process to create a total of six arcs. Then he turned the bag over and started to hook the petals by looking at the reverse side. In the first arc, hook one short needle, three medium-long needles and one short needle, totaling five needles. In this way, a petal is completed. Complete the crochet of the six petals one by one in this way.
2. Special style design
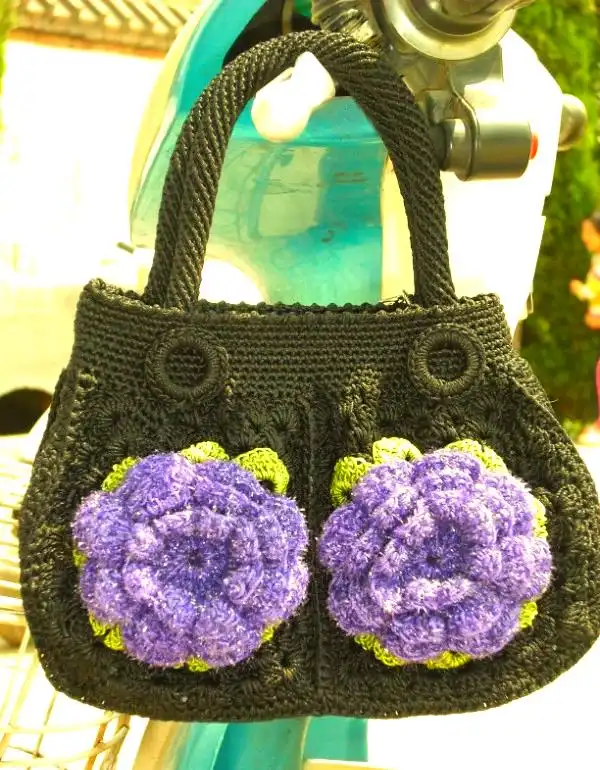
Next, we will also explore how to make a unique peony flower handbag. The small bag above is ingeniously composed of eight peonies. The crochet method of these peonies is similar to that of the decorative flowers crossed diagonally across the backpack earlier, but at the beginning, 16 medium-length stitches need to be crocheted. After that, eight petals are crocheted in each layer, totaling three layers. After completion, the flowers are round. With ingenious design, they can be formed into squares.
The specific hooking method is as follows: Hook three short needles right in the middle of each petal, and then crochet four small braided needles. In the middle of the second petal, hook out six medium-long needles. Two of the medium-long needles are joined together, and then hook two more joined together. Repeat this process, and hook out six needles in three groups. Then crochet four small braids and crochet three short stitches in the same way in the middle of the third petal. By analogy, complete the crochet of the eight petals and finally connect them with short needles.
Then, crochet another row of medium and long needles. In this line, three medium-long needles are hooked at the three short needles at the beginning of the previous line, and four medium-long needles are hooked at the four small braids. In the gaps between the four corners, hook five medium-long needles respectively, that is, hook a total of 10 needles at each corner. By analogy, complete the crochet of the four sides of the square. At this moment, the peonies and the embellishments together form a perfect square.
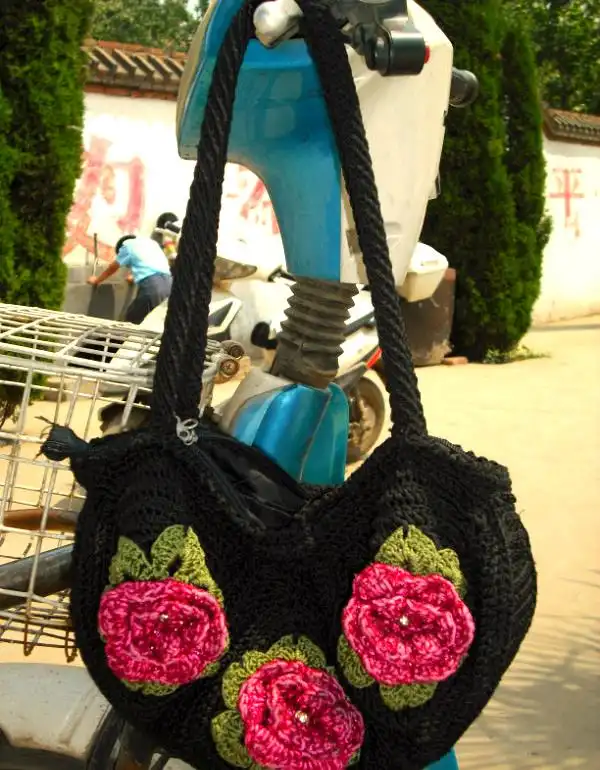
According to the above method, a total of 8 peonies were crocheted and connected one by one with short needles. Finally, the bag opening is hooked again, and the method is the same as that used for the bag opening of the crossbody backpack mentioned earlier. As for the straps, they are crocheted by the method of short needles spiraling upwards. Next, we will also explore how to make a unique peony flower single-shoulder crossbody bag. The crochet methods of these two bags are similar to those introduced before. For specific details, you can refer to the crochet techniques of the previous two bags. Don't hesitate any longer. Hurry up and start learning. We are looking forward to your excellent works!